All posts by 10five10

Rsyslogd configuration – sending syslog files to a remote host

Abstract

This article shows how rsyslogd.conf must be configured on both machines to send syslog messages from machine A to machine B using UDP.

Log Server configuration

Uncomment the following two lines in /etc/rsyslog.conf

Ubuntu

# provides UDP syslog reception
module(load="imudp")
input(type="imudp" port="514")

Redhat

# Provides UDP syslog reception
$ModLoad imudp
$UDPServerRun 514

Then restart the service with service rsyslog restart
You should now see that your server listens on port 514
# netstat -an |egrep '^udp.*514'
udp 0 0 0.0.0.0:514 0.0.0.0:*
udp6 0 0 :::514 :::*

Log Client configuration

Client configuration can be done either on /etc/rsyslog.conf, or in one of the files in /etc/rsyslog.d/ directory.

In order to send all logs to the server, you provide a filter and a destination like this :
*.* @192.168.1.2:514

I think it is worth a little explanation

  • *.* is the “FACILITY”.”PRIORITY” filter – it means that we actually dont filter anything. You can filter facilities by replacing the first asterisk with any of the facilities value (kern , user , mail , daemon , auth , syslog , lpr , news , uucp , cron , authpriv , ftp , or local0 through local7). you can filter priorities by replacing the second asterisk with a priority level (debug, info, notice, warning, err, crit, alert, or emerg)
  • @192.168.1.2:514 is the destination IP and port. A single “@” means UDP connexion – a double “@@” would indicate a TCP connexion.

Logging from files

Most application don’t use the system logging – and the above configuration won’t help.  However, it is possible to configure rsyslog to read an application logging file and send it over to the remote server.

For example, if I want to send over contents of /var/log/grafana/grafana.log to remote host, I shall adapt rsyslog.conf as follows :

module(load="imfile" PollingInterval="10")
input(type="imfile" File="/var/log/grafana/grafana.log"
tag="grafana.log"
StateFile="/var/spool/rsyslog/statefile1"
Severity="debug"
Facility="local6")

References

Using text file input module
Redhat documentation on rsyslog

Basic TryIt editor using PHP

Abstract

Like in many tutorial sites, it might be able to add a “tryit” editor to let your clients try your webservices without installing any client.

This little note explains how I built a basic TryIt editor for Soap webservices.

I illustrate with a public soap currency converter SOAP api found on the internet (Kowabunga.net currency converter)

Principle

We expose a form, and the user pastes his SOAP command in his browser.  He can also change the URL

The application will just add necessary headers to the request, and repost the contents to the backend server.

Note that no extra security is provided.  The only added value of this page is to let the developer focus on the contents of the ws call – hiding the headers complexity.

I also don’t use PHP soap functions : if the user makes a mistake in his message, the faulty message will get to the backend, the the user will receive the backend error (instead of a PHP error).  This means that the editor page may also be used to post to a JSON/REST endpoint with very few changes.

Installation php curl

The page uses curl to post messages.  PHP provides a interface to libcurl, but it is not installed by default.  Ubuntu provides a *.deb package, so I don’t bother with pip :

sudo apt-get install php7.0-curl

TryIt webpage

The form

I just create a form with 3 columns (input, tryit button and output), and the destination URL. When tryit button is pressed, it posts the “input” textarea contents to the same page :


<form method="POST" action="tryit.php">
<table width="100%" border="1px">
<tr>
<td colspan="3">
URL : <input type="string" width="100%" id="url" name="url" value="http://currencyconverter.kowabunga.net/converter.asmx"></input><br/>
</td>
</tr>
<tr>
<td width="40%">
<textarea name="input" id="input" rows="10" cols="100" ><?php echo htmlspecialchars($_POST['input']);?></textarea>
</td>
<td width="20%">
<input type="submit" value="try it"></input>
</td>
<td width="40%">
<textarea id="output" name="output" rows="10" cols="100"><?php echo htmlspecialchars($response);?></textarea>
</td>
</tr>
</table>
</form>

The goal is to post the form the same page (tryit.php) – If you call the page from a browser, the two highlighted “echo” commands will return nothing, and the form will be empty.

Communication to backend

When the user clicks on “Try It” button, the same page will be called from an HTTP POST command. When this occurs, we want to call the backend, and show to the user the request and the response. Here is the code that executes this


<?php

$ch=curl_init();
curl_setopt($ch, CURLOPT_URL,$_POST["url"]);
curl_setopt($ch, CURLOPT_RETURNTRANSFER, 1 );
curl_setopt($ch, CURLOPT_POST, 1 );
curl_setopt($ch, CURLOPT_POSTFIELDS,$_POST["input"]); 
curl_setopt($ch, CURLOPT_HTTPHEADER, array('Content-Type: text/xml; charset=ISO-8859-1'));

$response = curl_exec($ch);

curl_close($ch);

?>

The contents of “input” is posted to the backend, whose URL is also provided in “url”. I also add a mandatory soap header (‘Content-Type’)

Putting everything together

If you paste the form and the php code to your webpage, you have your “tryit” editor.

You can for example list the currencies known by the library with the following soap message :

<soapenv:Envelope xmlns:soapenv="http://schemas.xmlsoap.org/soap/envelope/" xmlns:tem="http://tempuri.org/">
 <soapenv:Header/>
 <soapenv:Body>
 <tem:GetCurrencies/>
 </soapenv:Body>
</soapenv:Envelope>

Not too nice, but working –

screenshot
Screenshot of tryit editor

Using git to keep environments synchronized

Abstract

In many classical IT environments, many different instances of a given system exist at the same time : production, several UAT and/or SIT systems, development system, etc…

In order to keep those systems synchronized, some procedures are often set up (delivery notes, hand-over forms, etc…) – that merely describe how to deploy adaptations to move from release X to Y.

To my opinion, those procedures bring too much rigidity, and lead to long-term divergence of the systems.  You certainly faced one of the following situations :

  • After a production problem, a quick fix is applied directly in production (and never mirrored to any test system)
  • Development team has delivered a nice binary, but did not think about housekeeping crontabs…  Production team writes them in their own scripts, but the change is not reflected in production
  • Project manager and half of the management board is on the shoulders of the IT team…  Developers push the binaries in a hurry, production team integrate it in the night, and, yes – we met the deadline – but nobody knows what has been done to get it running…

The goal of this blog post is to present an approach that does not break the procedures in place, but brings flexibility and allows auditing all changes (who made which change, when), even in extreme cases described above –

Git will be used as the main tool to guarantee systems are synchronized.  Git has been designed for other purposes (distributed source control system) – but as you will see, it is the perfect tool to keep our systems synchronized.

Goals

To simplify the presentation, I will assume only two systems : a test system and a production system.  But the same tools can be used to synchronize more systems.

Our integration of git must guarantee that

  • Environments are not connected together : all changes must be packaged and each package will be handed over from e.g. test environment to prod environment
  • Changes usually flow from development to production, but it must be possible to make a change in production environment, and integrate it in test.  (symmetric approach !)
  • Rollback must be straightforward
  • All changes on any system can be viewed easily – we want to know, with a single command
    • who applied a package
    • when was the package applied
    • summary of the changes brought
  • We must be able to know at any time if the system has been modified since last release, and which modifications were brought
  • Some files must be tracked, but some files must be ignored by the system (because we know they will differ between systems)
    • log files
    • some configuration files (e.g. JDBC connection strings…)
    • data files of the local RDBMS (we are just synchronizing filesystems)

Setting up system

Configuring .gitignore file

.gitignore will determine which files/directories will be tracked.  Ignored files are either system files, log files, some configuration files, etc…

For example, imagine an application (“seriousapp”) running on a unix system

├── dev
├── etc
│   └── seriousapp
├── home
│   ├── frank
│   ├── harry
│   ├── jenny
│   └── seriousapp
│       ├── appserver
│       │   ├── app1
│       │   │   └── log
│       │   ├── app2
│       │   │   └── log
│       │   └── app3
│       │       └── log
│       ├── logs
│       └── tools
├── lib
└── usr

Application is mostly deployed on /home/seriousapp but also has a configuration directory in /etc/seriousapp.  We want to keep track of changes in seriousapp, but avoid that changes that ‘jenny’ does on her home directory (/home/jenny) is detected by the system.  Some directories (*/log(s), usr, lib, …) shall also not be tracked.

The approach to build .gitignore is the following

  • exclude everything via .gitignore (–> wildcard *)
  • explicitly include application directories (–> all application directories are tracked)
  • in application directories, add an extra .gitignore, that will either include or exclude specific files or directories

In our previous example, we would have the following :

.gitignore contents :

*
!home/seriousapp/
!home/seriousapp/*
!etc/seriousapp/
!etc/seriousapp/*
!.gitignore
!*/

home/seriousapp/.gitignore, /etc/seriousapp/.gitignore contents :

(nb – without this line, subdirectories and files will be ignored)

!*

home/seriousapp/logs/, and all other log directories also contain a .gitignore file :

*
!.gitignore

OK – that was the hardest part – from now on, we will use the power of git to assist us !

Initialize the system

first cd to the root directory, then issue the commands

git init
git add .
git status #just check that all sensible files are listed here !
git commit -m "Release 1.0 (JIRA1234,JIRA3322,JIRA3224)"

Those commands will initiate a .git directory, holding a full copy of your files, and meta information.  You can feed the commit command with any string, but it is a good practice to put there the official release number, as well as a reference to all changes.

Execute these commands only on a single machine.  Once this is done, you can copy over the “.git” directory to all other machines you want to synchronize with.

After having copied “.git” directory, you can run a “git status” to retrieve all differences between the original and the target system.  For the sake of simplicity, I will assume there is no difference yet.  In the real life, it is time to synchronize manually the files…

You can also copy the “.git” directory to an empty place, and issue the following command to create a fresh-new copy of the original system :

git checkout HEAD -- .

In the next section, I will show you how to propagate differences.

Keeping systems synchronized

OK – Now you have two (or more) system initialized with the same contents.  Let us imagine that some modification has to be brought on the original system…

Thanks to git, you don’t have to take any measure (like creating a backup file) before you bring modification.  Just edit/modify the files, and you’re done.   For example, imagine that you change a timeout in etc/seriousapp/application.properties :

echo "CONNECTION_TIMEOUT=10000 >> etc/seriousapp/application.properties

After you’ve made all your changes, you can check all what you’ve done with “git status”.

$ git status
On branch master
Untracked files:
  (use "git add <file>..." to include in what will be committed)

    etc/seriousapp/application.properties

nothing added to commit but untracked files present (use "git add" to track)


It is a good practice to add files as soon as you’ve finished with them :

git add etc/seriousapp/application.properties

Once all your modifications are done (and added), you can commit

git commit -m "Release 1.1 (JIRA 3325)"

It is now time to follow your company testing procedure, and validate that your environment is working fine.  Once you are ready to deploy your changes to the target environment, first check that everything is commited :

$ git status
On branch master
nothing to commit, working directory clean

Then you will create a bundle.  Bundles are special git files that will contain all differences, and allowing to move from one version to another.

$ git bundle create /path/to/file.bundle master

After this step, you can move the “file.bundle” to the target system, and import it using the following command (check that the system is clean) :

$ git status
On branch master
nothing to commit, working directory clean
$ git pull --rebase /path/to/file.bundle master

the “–rebase” option is useful, when both source and target systems are modified and have started diverging.  Rebase will first rewind all changes to a version known by both source and target systems, apply the bundle, then re-apply all changes.  After this operation, you get a system with the desired changes and the modifications of the target system.  if “–rebase” is not used, git would merge the changes, and this causes a lot of issues mirroring the modifications on the source system.

What is nice with this approach is that it is completely symmetric : bundle file can come from either test or production system.  File creation and edition remain free, but all modifications are silently tracked by the git system, with a full control on rollback (using git checkout) and difference checking (using git diff).

Better  control using tags

Although the system is already useable, there is an important missing feature.  In production environments, we want to track who and when a given modification has been applied.

The tag mechanism of git can help us here :

After having installed a version on a production system, the operator will have to tag the version with a reference to the intervention :

git tag -a "v1.1" -m "Release plan R45"

You can freely choose tag names and messages, but here again, refer to your local procedures (for example, make a reference to a release plan)

Later on, you can query the system for all the tags, and all install dates with the commands

$ git tag
v1.1
v1.2
$ git for-each-ref --sort=taggerdate --format '%(taggerdate) %(refname) 
%(taggername) %(subject)' refs/tags
Sun Jun 5 22:58:02 2016 +0200 refs/tags/v1.1 frank Release plan R45
Sun Jun 5 23:02:15 2016 +0200 refs/tags/v1.2 jenny Release plan R46

Summary

Using git on various instances of a system allows to act on system divergence.  The use of “bundle” files keeps environments isolated from each other, and tagging (on the production system) bring a smart solution to track the author and the installation dates.

Git was not designed for this purpose, but its versatility and flexibility has brought us a surprisingly well-suited tool to track system divergences without changing how our company manages releases.

Git offer many side tools that are not described in this blog.  For example “git diff” allows to quickly check what has changed in the last bundle.  The use of branches might also be beneficial when it comes to experiment, or apply temporary patches.  I have not discovered yet all benefits of git, but for sure, its adoption in production environments makes lives easier.

 

Use Samba to share linux drive

In order to share a linux drive with a windows client (Ubuntu 14.04, samba4)

apt-get install samba

modify /etc/samba/smb.conf as follows


[share]
comment="/home/xs on linux server"
path=/home/xs
browsable=yes
gest ok = no
read only = yes
create mask = 0755


  • share : name of the share
  • path : path to the shared directory on linux box


Once this is done, you need to add each unix user to the samba database (SAM), using pdbedit (it will only work if the username is already declared under /etc/passwd) :


root@tartaljote:/etc/samba# pdbedit -a isabelle
new password:
retype new password:
Unix username:        isabelle
NT username:
Account Flags:        [U          ]
User SID:             S-1-5-21-651575556-1655300615-888365899-1001
Primary Group SID:    S-1-5-21-651575556-1655300615-888365899-513
Full Name:            Isabelle,,,,
Home Directory:       \\xxxxxxxx\isabelle
HomeDir Drive:
Logon Script:
Profile Path:         \\xxxxxxxx\isabelle\profile
Domain:               xxxxxxxx
Account desc:
Workstations:
Munged dial:
Logon time:           0
Logoff time:          Wed, 06 Feb 2036 16:06:39 CET
Kickoff time:         Wed, 06 Feb 2036 16:06:39 CET
Password last set:    Fri, 01 Jan 2016 14:03:15 CET
Password can change:  Fri, 01 Jan 2016 14:03:15 CET
Password must change: never
Last bad password   : 0
Bad password count  : 0
Logon hours         : FFFFFFFFFFFFFFFFFFFFFFFFFFFFFFFFFFFFFFFFFF


Communicate with ESXi hypervisor with java interface

My ESXi running at home waste electricity when I don’t use it. Therefore, I tried to find an easy way to turn on/off the hypervisor hardware on demand (understand – from my smartphone).

Turning on the hardware is easy
– Install WakeupOnLan from android market, enter the MAC address of your host NIC, and you’re done.
– I also had to change the BPL convertor, because newest model provided went to sleep after approx. 30 minutes inactivity

The long story is about turning off the host…
It is possible to enable SSH and send “poweroff” and “shutdown.sh” commands. But I did not find it fun enough, and since SSH is not activated by default on ESXi, the solution is not optimal.

It is more interesting to dig into ESXi API (webservices on port 443).
VMWare provides a library for this, and this tutorial explains how to proceed to write your first application. And here is the link to the library : vSphere 5.5 Management SDK.

The problem you’ll encounter is that ESXi is shipped with a factory certificate, which does not relates to the actual hostname you gave to the box.

I also had problems setting up the certificate, because setting the IP address in the “CN” field seems not acceptable by the java SSL library (java.security.cert.CertificateException: No subject alternative names matching IP address 192.168.x.x found).  I had to add X509 subject alternative names to the certificate (what I never did before).

Here is the procedure :

  • copy /etc/ssl/openssl.cnf to a working directory, and change the following fields :
    • private_key    = $dir/path/to/your/cakey.key
    • and in section [v3_req]
      • subjectAltName=@alt_names
        [alt_names]
        DNS.1=octopus
        DNS.2=192.168.x.x
  • openssl req -config /path/to/your/local/openssl.cnf -new -key /path/to/your/server.key -subj ‘/C=be/ST=my_state/L=mydown/O=some organization/CN=octopus/emailAddress=nobody@root.com’ -out octopus.csr
  • openssl ca -config openssl.cnf -in octopus.csr -cert /path/to/your/ca.pem -keyfile /path/to/your/cakey.key -extensions v3_req  -out octopus.crt

When this is done, copy the file “server.key” and “octopus.crt” respectively to /etc/vmware/ssl/rui.key and /etc/vmware/ssl/rui.crt (yes, filenames matter)

You can check with openssl :

openssl s_client -showcerts -connect 192.168.x.x:443 < /dev/null (the certificate displayed must have two SubjectAltNames.

_________

Now take your CA self-signed certificate, and load it to a java keystore.

When starting the test application, refer to your java keystore with the option :

java -Djavax.net.ssl.trustStore=/home/xs/workspace/HelloVmware/keystore.jks -cp your:class:path your.package.HelloVMWare

_______________

(btw – sorry for the telegraphic style – this blog post was mainly to fill gaps of vmware documentation, not to document everything once again)

Using control groups (cgroups) to throttle CPU usage of badly-programmed application

Imagine the following scenario : you must maintain an application, and one of its components sometimes eats lot of CPU.

In this scenario, you don’t have any possibility to fix this badly-written component, but you don’t want it to slow-down your whole server…

This tutorial is based on CentOS6.

I will simulate this by writing a forever-loop in a bash-script :


#!/bin/bash
while true; do
echo i am bad > /dev/null
done

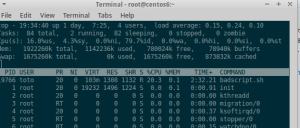
Run this script in a separate window, and check the CPU usage with “top” :

top - without cgroup

Our bad script takes almost all CPU ressources

In order to reduce the impact of this process on the system, we will run it in a cgroup, and configure this cgroup to throttle CPU usage.

Cgroup is a feature of linux kernel.  It allows to tweaks some parameters (CPU, I/O, memory, etc…) for a group of processes in the system.  You’ll need to install libcgroup to use cgroups :

yum install libcgroup

After libcgroup is installed, you must start cgconfig service

service cgconfig start

Before using cgroup, you must build a hierarchy.  There may be several hierarchies in the system.  Each hierarchy is mounted (the same way you mount a filesystem – via mount command, or /etc/fstab) :

mkdir /cgroup/mycpu
mount -t cgroup -o cpu my_cpu_hierarchy /cgroup/mycpu/

  • -t cgroup : cgroup is the name of filesystem type
  • -o cpu : in this cgroup, we will only tweak cpu (cpu reffered as the controller)
  • my_cpu_hierarchy – just choose a name for your hierarchy
  • /cgroup/mycpu – this is the mountpoint (where you will be able to read and write cpu parameters…)

When hierarchy is mounted, you can create your cgroup in it (as you might have guessed, you can build a whole hierarchy of cgroups – and play with weights to control resource distribution within the cgroup – out of scope for this tutorial)

cgcreate -t toto:toto -a toto:toto -g cpu:/mycpu

  • -t toto:toto : user toto, in group toto will be allowed to add tasks to the cgroup
  • -a toto:toto : user toto, in group toto will be allowed to modify accesses to the cgroup
  • -g cpu:/mycpu : you must provide the controller, and the mount point of your cgroup

After cgroup is created, you will be able to tweak CPU parameters.  RedHat documentation provides the name of parameters (cpu_cfs_perios_us and cpu_cfs_quota_us) :


cgset -r cpu.cfs_quota_us=100000 mycpu
cgset -r cpu.cfs_period_us=500000 mycpu


Now that we’ve set our first cgroup, it is time to test it.  Open two windows.

  • On the first window, start the script
  • Get the process-id (ps -df |grep badscript.sh)
  • Move the process to the newly-created cgroup :


cgclassify -g cpu:/mycpu 19766

  • -g cpu:/mycpu : you must provide the controller and mountpoint of your cgroup
  • 19766 is the PID of badscript.sh

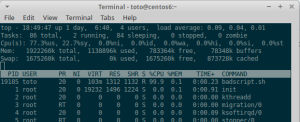
top - within cgroup

We’ve done it ! Without stopping the process, we’ve reduced its impact to 20% of the CPU !

Reference : Red Hat Ressource management guide


use dd to convert certificate data (base64) to format readable by openssl

Sometimes, X509 certifiates are one-liner

Openssl only reads format similar to this

-----BEGIN CERTIFICATE-----
   MIIDKDCCAhCgAwIBAgIBDjANBgkqhkiG9w0BAQUFADA/MR0wGwYDVQQKExRVc2Vy
   c3lzUmVkaGF0IERvbWFpbjEeMBwGA1UEAxMVQ2VydGlmaWNhdGUgQXV0aG9yaXR5
   MB4XDTA4MDMwNzIzNDc0NloXDTA4MDkwMzIzNDc0NlowVzETMBEGCgmSJomT8ixk
   ARkTA2NvbTEWMBQGCgmSJomT8ixkARkTBnJlZGhhdDEoMCYGA1UEAxMfaXBhLXBr
   aS1kZW1vLnVzZXJzeXMucmVkaGF0LmNvbTCBnzANBgkqhkiG9w0BAQEFAAOBjQAw
   gYkCgYEA2k8S1YM/mqOYA7DEv/jLR1hkBkccScexR/uPmB17oClJD8kvC4RJYsFT
   bqzhQox9pZO+83iAHtwetH3R6SeK1TrhHnA9iMrqjBi3dLG+AmY0WVKFwI72fmIm
   y3APyDpexuVOAMsqVrxcacZc5Ud2CnyqIV3AxxVSkDjBxfZ83mkCAwEAAaOBmjCB
   lzAfBgNVHSMEGDAWgBQdD1lBEqDxVr481x1xR/KWve1hLTBPBggrBgEFBQcBAQRD
   MEEwPwYIKwYBBQUHMAGGM2h0dHA6Ly9pcGEtcGtpLWRlbW8udXNlcnN5cy5yZWRo
   YXQuY29tOjkwODAvY2Evb2NzcDAOBgNVHQ8BAf8EBAMCBPAwEwYDVR0lBAwwCgYI
   KwYBBQUHAwEwDQYJKoZIhvcNAQEFBQADggEBAC/UT6jgQyao9jERzHvUZFmEZABE
   0la7gU9RPcZsJ6kylz8O27bqbXLlEqrlni8Er0NSgLL9BNcA8ohgQk3SMRvbMgii
   Ofn2mJ7HSTSxwZEctIDOZMp9GAIn3snHBIOhGWQGxPuWQYH+WbcxY/PdGbqh4uX0
   1tVRUMWOLl81yiWxn7HNVVxUretN1uWvqUX4VIn9BYwzV6Tal/0X76lZ5Cna7HAc
   ddEsrtAZ74WGFoZDAYquvWHGZI2QAyqUH4zNWua/TXnRvMwrauPpYWzWMd2PTPKl
   IY+93HV/dqqgzjlnNBsDPTz3yvbyfedfIU4Lx2WkeiI56ytAib/dyWBGMbg=
   -----END CERTIFICATE----

If the data comes in one line (for example in a SOAP message

                    <wsse:SecurityTokenReference>
<wsse:KeyIdentifier
EncodingType="http://docs.oasis-open.org/wss/2004/01/oasis-200401-wss-soap-message-security-1.0#Base64Binary" ValueType="http://docs.oasis-open.org/wss/2004/01/oasis-200401-wss-x509-token-profile-1.0#X509v3">
MIIDXTCCAkWgAwIBAgIEA79iHDANBgkqhkiG9w0BAQsFADBfMQswCQYDVQQGEwJMVTESMBAGA1UECAwJTcO8bnNiYWNoMQswCQYDVQQHEwJMVTEPMA0GA1UEChMGQ2V0cmVsMQ0wCwYDVQQLEwRDSVBFMQ8wDQYDVQQDEwZ4YXZpZXIwHhcNMTQwNjIxMTU1OTE2WhcNMTQwOTE5MTU1OTE2WjBfMQswCQYDVQQGEwJMVTESMBAGA1UECAwJTcO8bnNiYWNoMQswCQYDVQQHEwJMVTEPMA0GA1UEChMGQ2V0cmVsMQ0wCwYDVQQLEwRDSVBFMQ8wDQYDVQQDEwZ4YXZpZXIwggEiMA0GCSqGSIb3DQEBAQUAA4IBDwAwggEKAoIBAQCFyf0kJJHhqBUMs9cfmNoiOUhW8dD1IgPq+9hDENIC+FouxV9TdQcbJIstL+2MVAhLM2yxqUM2wLR8R14OHoNTkys5oTQ5+gDTB9av6Q3w1t+o8VWJMDjn2iYnESR6GH8Fxha97mpwHyvYJfSf00M4gzt7YKGhLY30b4J6k3IkwN2+vFpM1Ekk7a30iyQ0VUg9WoImhlYz17bq8GcalzjvTP1Y2lx/u79B/+cX2CX/GzvZcZS82cxJkF6TgttEsN6KFuQdKeskC7MKkmkeDZvBvjr5vJldnBtjvaBburC9L2EMmHkzd7vUDtyE1T77E21DoA6YkxQ5PweUUP2pLvmtAgMBAAGjITAfMB0GA1UdDgQWBBT4idbyY5CNxZ08uNfT+jZKue1tyzANBgkqhkiG9w0BAQsFAAOCAQEAcMDcFEavQ6+kDd3rcKdWdHgXRqaa2K02sELr0MY2guO0fkPWTEdwZ6JG7xVKqpyhvS+CcMAplFb+We5zPpi/T0zeDsPuWkfbmqXmeRXzl+HDZBZwyrYyDzacJ39Fi2T+OUWyZ+9bCxU2oe1pANuY3PrnizN2CHN3XriuK/MSLozrHdvENePw6t+1u/2J+mGj9jBUgKbezTERYtveAZt/69OecWhfSAkJqzmtefKNGOV4apg/kdnm995VkjZ9k7wQbqsC936pwFj0fn/EydlLJsDJdyfVR+AZufnUTi7z13wCaG35T83l0VtjdNFbgvLJIJlvDP12MEZPytd1fUfGPA==
</wsse:KeyIdentifier>
</wsse:SecurityTokenReference>

use the following script to convert to desired format

echo "-----BEGIN CERTIFICATE-----"
dd if=/path/to/your/file conv=unblock cbs=64 status=none|egrep -v '^$'
echo "-----END CERTIFICATE-----"
  • conv=unblock will insert a newline every “cbs” bytes
  • cbs=64 sets the width of a row of data to 64
  • status=none suppress unuseful status information of dd
  • egrep -v ‘^$’ removes empty lines from the output

syslog-ng in a nutshell

Here are some notes about syslog-ng, which is often installed as the default logging system on many unix distros.

I will explain how to configure syslog-ng to create specific logs for a given application, and how to transmit logs to a remote log server.

Logging system from developer point of view

Let’s start with a man syslog command – what do we learn there

  •  void syslog(int priority, const char *format, …); Any call to this command will trigger the logging system mechanism.
  • Priority is a concatenation of “facility” and “level”.  I don’t find the concept of “facility” really useful (it is too rigid) – so, you can just concentrate on “level” – level “0” is the highest level, and level “7” is the debug level.  To retreive level, just “AND” priority with 0x07.
  • Openlog and closelog() are not really necessary – I will use openlog() to hide the concept of faciliy, but you can just skip this line.

With the man page, you can writ a small application that throws something in the logging system :


#include 
#include 

int main(int argc,char *argv[])
{
 openlog("balaba",LOG_CONS,LOG_DAEMON);
 syslog(LOG_WARNING,"%s","This is a warning");
 syslog(LOG_ERR,"%s","This is an error");
 return(0);	
}

The application will write to console and to the internal syslog system a warning and an error message.

Configuration of syslog-ng

On my linux box (the result might be different on your system), running this application will generate the following in the message logs :

  • /var/log/daemon.log will show two log lines
  • /var/log/syslog will show two log lines
  • /var/log/error will show only one log line (the LOG_ERR line)

This behavior is explained by the syslog-ng configuration (found under /etc/syslog-ng/ directory) :


source s_src {
       system();
       internal();
};
#...
destination d_daemon { file("/var/log/daemon.log"); };
destination d_syslog { file("/var/log/syslog"); };
destination d_error { file("/var/log/error"); };two
#...
filter f_daemon { facility(daemon) and not filter(f_debug); };
filter f_syslog3 { not facility(auth, authpriv, mail) and not 
filter(f_debug); };
filter f_error { level(err .. emerg) ; };
#...
log { source(s_src); filter(f_daemon); destination(d_daemon); };
log { source(s_src); filter(f_syslog3); destination(d_syslog); };
log { source(s_src); filter(f_error); destination(d_error); };

This is just an extract showing only relevant part of the configuration :

  • s_src represent a “source” composed of the linux syslog itself (system) and all messages generated by syslog-ng itself (internal)
  • 3 destinations are set up, they represent the 3 above-mentionned files
  • 3 different filters are defined.  Note that the “warning” log message will match two of them, while the “error” log message will match all 3.
  • The “log” lines will glue everything together, allowing the application to write its messages to 3 different files

Adding your own log file

It is easy to extend the syslog system, adding new log files.  For example, with the following additions in syslog-ng.conf, one could write a logfile dedicated to the application :


filter f_balaba { match("^balaba"); };
destination d_balaba { file("/var/log/balaba.log"); };
log { source(s_src); filter(f_balaba); destination(d_balaba);};

The extra filter will match the “balaba” string (the first argument in our “openlog” call).

We define a new destination (d_balaba) pointing to a file (/var/log/balaba.log)

And we glue everythig together with a “log”instruction.

You need to restart the syslog-ng (/etc/init.d/syslog-ng restart).

Now, if you re-launch the application, the log lines will also be written to /var/log/balaba.log

Writing logs to the network

If you have syslog-ng installed on two machines, you can send the log lines to a remote server by editing syslog-ng.conf on both client and server :

On client :

destination remote { tcp("your.server.address.com" port(1234)); };
log { source(s_src); destination(remote); };

On server :

source s_net { tcp(ip(0.0.0.0) port(1234)); };

destination collector {
file("/var/log/hosts/$HOST/$FACILITY.log"
owner(root) group(root) perm(0644) dir_perm(0755) create_dirs(yes)
);
};

log { source(s_net); destination(collector); };

The client’s loglines will be written on server’s file named /var/log/hosts/{ip_addr_of_client}/{name of facility}.log

There are many other possibilities – I invite you to check the official syslog-ng manual ( http://www.balabit.com/network-security/syslog-ng/)

Connect a device to both LAN (with local IP) and to the internet – IP forwarding example

Today, I had to configure a TCP/IP equipment with fixed IP that had to connect to a linux server with a fixed IP, and to the internet.

On the paper, changing it was just a matter of changing a few parameters – but I wanted to test the device (therefore connect to both a fixed IP and to the internet).

I gave IP 192.168.1.174 to the device (let’s call it the “client”), and 192.168.1.15 to my linux box (a laptop simulating the server).

Now the problem is that the client needs to connect to the internet.

Solution : set the default gateway to the client to 192.168.1.15, and use the wifi NIC of the server to connect to the internet.

The server needs now to be configured as a router.

1/ It must route the packets from the client (192.168.1.174) to the internet

2/ It must “masquerade” the IP address of the client, in such a way that the internet can not see the original IP address, but a valid internet address (the same address as the laptop server).

Here is how to proceed.

1/  echo 1 > /proc/sys/net/ipv4/ip_forward

This will enable routing on the server

2/ iptables -t nat -A POSTROUTING -o wlan0 -j MASQUERADE

This will masquerade the IP address on the local network (192.168.1.*) to the IP address of the server on interface wlan0.

__________

BTW – to connect to wlan, I sed “wicd” which is just fine (hides the complexity of setting up a wlan WPA2 from the command line), but apparently, it is configured to enable only one NIC (the wlan or eth0)…  Workaround was to force enabling eth0 from the command line (ifconfig eth0 192.168.1.15 netmask 255.255.255.0 up)